a peek inside the fishbowl

It’s been awhile since I’ve written a “will they eat it” post here on the Fishbowl… mostly because I’ve been cooking up the same dozen recipes over and over. I felt like it was high time to get out of my rut so I poked around for a new chicken recipe that might win my family over. And guess what. I DID IT.

I liked the sounds of this slow-cooker recipe and made a few little adjustments here and there.  Most notably, I made the sauce and tossed it in a big zip-loc back along with the chicken the night before. (Woot!) By shifting my prep time to the night before I saved myself some time in the kitchen the next day as well as garlicky hands and cooking smells that I can’t really stomach before I’ve had my morning coffee. :)

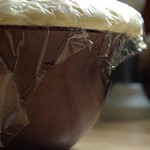
This shot is from lunch the next day:

November 27 #dailylunches - Slow-cooker sesame chicken

Seriously. This is my new favourite recipe. Make ahead! Slow cooker! Lots of leftovers that actually Tastes Good.

Anyway, this is my version of the recipe:

  • 1kg. boneless, skinless chicken breasts (about 5) I bet this would work with tofu too! Hmm.
  • 1/2 cup honey
  • 1/3 cup soy sauce
  • 1/4 cup chilli sauce
  • 1/4 cup hoisin sauce
  • 1 1/2 Tbsp sesame oil
  • thumb-sized knob of fresh ginger, finely chopped
  • 1 Tbsp garlic, finely chopped
  • 1/2 small onion, finely chopped
  • freshly ground pepper (to taste)
  • 2 Tbsp corn starch
  • 2 Tbsp cold water
  • sesame seeds, for garnish
  • green onion, for garnish

1) Combine the honey, soy sauce, chilli sauce, hoisin, sesame oil, ginger, garlic, onion, and pepper in a bowl, stirring well to combine. Add chicken and toss to coat. At this point you can either put it all in the fridge until the next day (which is what I did), or throw it all in the slow cooker.

2) Once you’re at the slow-cooker stage, cook for 4-5 hours on high or 8-10 hours on low. Remove the chicken to a plate and cut into pieces. (I liked the original author’s suggestion of shredding it, so that’s what I did.)

3) Combine the corn starch and cold water together in a small bowl. Set aside. Using a ladle, transfer the sauce from the slow cooker to a small saucepan set to medium-high heat. Whisk in the cornstarch mixture. Bring the liquid to a boil and cook for a few minutes until it thickens.

4) That’s it! Dinner is ready to go.

I put the shredded chicken and the sauce out in the kitchen – buffet-style – along with some cooked rice, a mixture of lightly sautéed broccoli and snow peas, and the garnishes.

Everyone enjoyed dinner and mum was happy she found something new to add to her family’s dinner repertoire. A big success!


26 Nov, 2013

Make your own Bits n’ Bites

By andrea tomkins in Recipes and Food

Homemade Bits n' Bites recipe

My mother-in-law made a batch of these homemade bits and bites and it suddenly dawned on me… we used to make these all the time but somehow it totally fell off my radar. I’ve decided it’s time to revisit this little treat. It’s easy, yummy, and it makes A LOT, but you can totally make this work in your favour.

1) If it’s packaged up in a little tins it makes a nice little gift for school friends, neighbours, work friends.
2) It freezes well. Toss everything in large freezer bags and pull it out when you have company over.

It’s not as fancy as this candied nut recipe (I like to bring that one along as a hostess gift this time of year) but homemade bits and bites are a lot cheaper, AND they are appreciated by kids and adults alike.

As an extra bonus, this recipe is super forgiving as it pertains to tastes and nut allergies. You basically toss in whatever you like!  I don’t usually add peanuts (my MIL did in the batch pictured above) or cheese crackers (like goldfish) but you can add both if you’re keen. We’ve made this with regular Cheerios, no-name brand, honey-nut Cheerios, Shreddies, Chex, Crispix … whatever! Bulk stores are your friend here. You can tinker with the quantities too.

Bits and Bites party mix recipe

4-5 cups Cheerios
4-5 cups Shreddies
6 cups pretzels

1/2 cup unsalted butter
2-3 tablespoons brown sugar
2 tablespoons Worcestershire sauce
1 teaspoon salt
1 teaspoon onion salt
1 teaspoon garlic powder
2 tablespoons chili powder (optional)
4-6 drops Tabasco sauce (optional)

1. Place your rack in the lower position and preheat the oven to 250°F. Get out your turkey roaster, or a foil pan used for this purpose.

2. Combine the cereals and pretzels in your roasting pan.

3. Melt the butter in a small saucepan over medium-low heat. Add the sugar and spices and stir well to combine. Drizzle over the cereal mix and stir well to coat.

4. Bake for about 1-2 hours, stirring every 15-20 minutes with a wooden spoon. Let cool and pack into freezer bags.

5. That’s it! You’ll have enough to last you from now until Christmas I bet!

23 Nov, 2013

My new fave recipe for dry rub

By andrea tomkins in Recipes and Food

Awhile back I bought a package of chicken drumsticks, somewhat grudgingly, with a sigh. They were on sale ($4.23 for 8 pieces), but I had no clear idea what to do with them. This dry rub makes the chicken very flavourful, and it works with the skin on or off. (We make drumsticks with the skin on here at Casa Fishbowl.)

The Fishbowl dry rub recipe for drumsticks (makes enough for about 8)

1 tsp. paprika
1 tsp. Italian seasoning
freshly ground black pepper (to taste)
1/2 tsp. sea salt
1/2 tsp. garlic powder
1/2 tsp. onion powder

This doesn’t sound like it makes very much, but it’s fine. Trust me.

Mix the spices together in a small bowl. Dry rub is forgiving so don’t worry if you aren’t a patient and precise measurer (like me). Lightly sprinkle the meaty parts of the chicken. Try for even coverage on all sides of each drumstick. Let them sit quietly – gathering flavour – on a plate while you pull the rest of dinner together, maybe for 30 minutes or so to let the spices soak in a bit. Grill the drumsticks as you normally would, and serve. I imagine you can broil them in the oven too.

We are serving these tonight with a tossed salad and some sweet potato fries. We’ve found that chicken made with this dry rub makes great leftovers for lunch the next day too. Let me know if you try this recipe!

Archives


  • Jeanie Maennling: I spent many wonderful days visiting my cousins and Uncle Herb and aunt Eleanor at the Farm in the 1950's. Mycousin Skippy (Sharon) and I got into l
  • alex: For a classic Canadian treat for valentine day , try a BeaverTail (a fried dough pastry) there its yummy
  • Juliet Luiz: I was at this park today and saw the foundation and historical sign which got me curious and let me to your blog post! Great information:) too bad t
  • Rowyn Tape: Hello, I was sitting at Easter dinner with my grandmother and she was telling me this story. She is Herbert Lytles daughter who eventually bought the
  • Bernie: I freeze ball sizes of bread dough for beavertails each winter season.Easy to thaw, roll out and fry. Best winter treat!
  • Jen_nifer: I feel very much the same about my SUP. Floating with snacks is fantastic! When I go on water with some current, I make sure that I paddle into the cu
  • sam: Great article. This is very insightful. Thanks for sharing

The Obligatory Blurb

My name is Andrea and I live in Ottawa with my husband Mark and our dog Sunny who is kind of a big deal on Instagram. During the day I work as a freelance writer. I am a longtime Ottawa blogger and I've occupied this little corner of the WWW since 1999. The Fishbowl is my whiteboard, water cooler, and journal, all rolled into one. I'm passionate about healthy living, arts and culture, travel, great gear, good food, and sharing the best of Ottawa. I also love vegetables, photography, gadgets, and great design.

If you're so inclined, you can read more about me here.

I've deactivated the commenting function as well as my contact form so if you want to get in touch, please drop me a line at quietfish@gmail.com. Thank you!


Goodreads