a peek inside the fishbowl

Once again, that troublemaker Lara asked me whether I was planning another Hourly Photo Challenge for Easter Sunday. How could I say no?

The general idea is to take one photo every hour for the whole day (Sunday April 24). The photo has to be of whatever you happen to be doing at that time. You don’t need to be a photographer in order to participate. I know some people are shy to post their photos, but this is not a contest or competition, it’s about documenting your day in an easy and interesting way and seeing how others do the same.

Also, and I want to note, not everyone celebrates Easter, but that’s part of what I think is compelling about these hourly photo projects.

This year I’m going to suggest that everyone who participates take one photo every hour, at the top of the hour. So for example, if your kids drag you out of bed at 6:25 a.m., your first photo will be at 7:00 a.m., then 8:00 a.m. and so on. End when it gets tiresome, or too dark to see. :)

Here is how it works:

  • Use whatever camera or mobile device you prefer. I’m using in iPhone, because it’s easy and I can upload as I go. 
  • Post them to your blog and/or your photosharing site as you are able. Just make sure you let us know in the comments below where you’re posting them so we can all have a look.
  • If you’re tweeting them out, use #hourlyphoto so others can follow along. Tag them with “hourlyphoto” on Flickr too, so they’re findable that way too.

Here’s a tip, if you have a mobile phone with an alarm clock set it for one minute before the hour i.e. at 7:59, 8:59 etc. Not only is this a great reminder, but it will give you a solid minute to get your camera ready and snap The Thing You Happened To Be Doing.

Please consider playing along! It’s really interesting to see what other people are doing at the same time you are. (Um, that is, if in the same time zone, but if not, that’s okay too.)

Also: it’s not a problem if you can’t upload as you go. Upload in batches when you have the chance. Or even the next day. Whatever!

I hope you join me! I always enjoy seeing what you come up with. :)
21 Apr, 2011

Reno post #005 – the office

By andrea tomkins in Home/reno

I haven’t written about the reno in awhile, but it is still underway, chugging along. We are in the middle of some back-and-forthing with our architect about what it’s actually going to look like. Nothing official yet, but we are narrowing it down.

Let’s just say it’s going to be a fine balance between open-concept and not-so-open concept. :)

I am still scouring magazines for clever ideas, perhaps naively looking at “small picture” kinds of details (eco-friendly driveways! Pocket doors!) when I really should be focusing on the big picture kind of stuff right now.

There is one rather large issue that needs to be resolved, and that has to do with our office. It’s really quite worrysome, because we desperately need this space. This is where I work. (In fact, this is where I am writing this post right now!)

Our home was built in the 1940s and as far as we know the office was added about a decade later. Major cracks have appeared on the exterior wall. There isn’t a full basement underneath it, it’s just a spider-filled crawlspace there right now. It’s drafty. The insulation is poor and needs to be updated, but our main fear is that the addition may not have been built on very firm soil and may be shifting away from the main house. There are questions about heaving foundations and clay. 

Through our architect we hired a structural engineering firm to come and look at it, and today was the day. She was here early, and cheerfully inspected the crawlspace (*shiver*), the inside of the office, and checked out the damaged stucco outside.

Worst case scenario: it’s going to cost untold thousands to prop it up and redig (?) the footings, at which point we will have to decide how much is too much. We need to figure out how much this room is worth to us. Five thousand, ten, twenty? If we can’t save it we’ll have to tear it off and figure out another plan for the office (and closet, and 2-piece washroom that goes along with it). I had a neat idea of designing a large work area that runs parallel to our dining room, just wide enough for desks, clever shelves and chairs and then hiding the whole thing behind a series of opaque screens on tracks, but Mark wasn’t keen on this kind of design innovation. :)

Fingers crossed we can keep this space as is!

20 Apr, 2011

Tomkins’ Toastee Meat Snax™

By andrea tomkins in Recipes and Food

a.k.a. a recipe for schnitzel
a.k.a. how to assemble and make your own breaded pork cutlets

Sorry to keep making a spectacle of myself in the toasted meat department but I am compelled to illustrate that it is possible to have toaster-ready* meat snacks on hand if you so desire, and you can make them yourself and not have to rely on something that has been sold to you and/or you have dug up in the frozen food aisle. 

If I can convince ONE PERSON not to buy toaster meat I will consider this post A JOB WELL DONE.

In case it’s not perfectly clear, this is a quickie how-to-make breaded cutlets. :) You can use pork, turkey, or chicken. I used pork this time around, but it is VERY good with turkey and I suggest you try it.

* And by “toaster ready” I really mean toaster oven, and if this strikes you as a major inconvenience, well, ok then.

I recommend eating Tomkins’ Toastee Meat Snax™ for dinner, not necessarily as an afterschool snack as Big Food would lead you to believe. But hey, whatever floats your boat.

Tomkins’ Toastee Meat Snax™

You will need:

  • meat of choice (I used pork)
  • bread of choice (I used the heels of rye and multigrain loaves I had kicking around)
  • seasoning of choice
  • two or three eggs
  • a splash of milk
  • oil for frying (I use canola or peanut oil)

First, the breading. I sometimes use ordinary pre-made breadcrumbs, but knowing that my grandmother would be appalled I do try to make my own using multigrain bread. In this case I used up some not-so-fresh rye bread and the heels of a loaf of multigrain (because no one eats those anyway).

DIY breadcrumbs

You can save yourself a few minutes by doing this part ahead of time and storing it in the fridge.

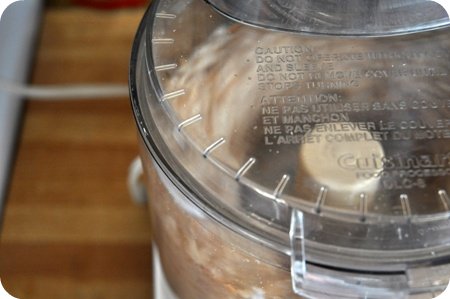
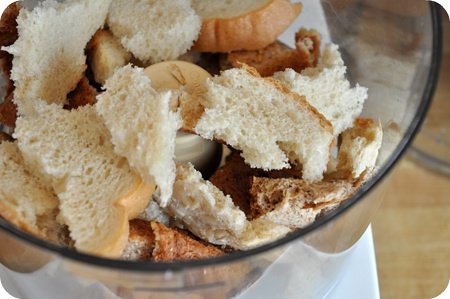
Tear the bread into chunks and pulse it in your food processor until, it has, um, turned into breadcrumbs.

Goodbye bread, see you on the other side

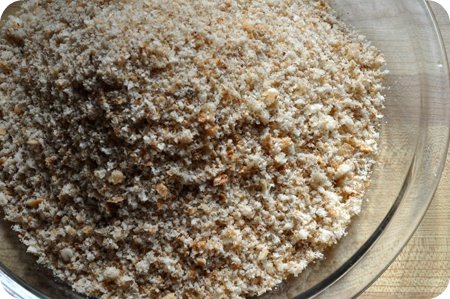
See how pretty it is?

Baby breadcrumbs

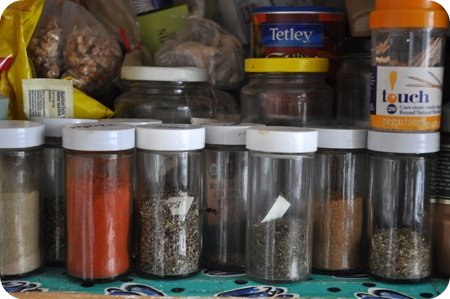
Dig into your spice rack. Hopefully it is a bit more organized than mine.

Spice mess

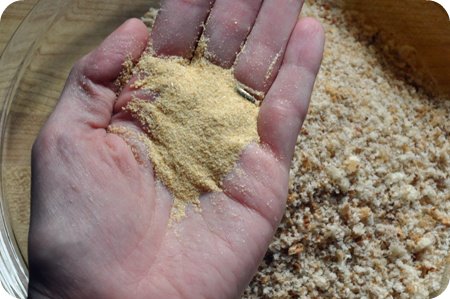
And mix in a bunch of spices that suit you. Be generous (because that’s a lot of bread we just whirled up).

spices

Consider adding some dried basil, oregano, garlic powder … really, it’s up to you. You are the master of your own schnitzel!

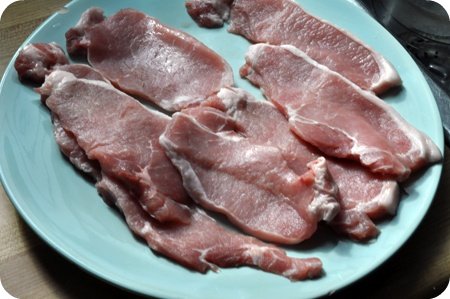
Speaking of which, have you noticed that raw meat does not photograph very well?

raw

Do note: Tomkins’ Toastee Meat Snax™ are even better if you pound the crap out of them beforehand with a meat tenderizer (which also does wonders for stress levels btw). But these seemed thinnish so I skipped that step.

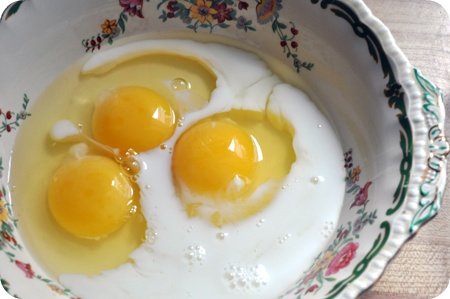
So het your eggs ready. Add a splash of milk.

Eggy

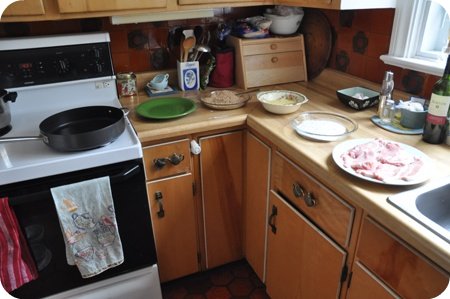
Get your workstation ready, because there’s an order to breading.

kitchen setup

First you coat the cutlet in flour:

flouring

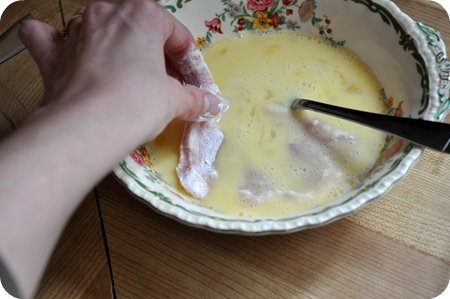
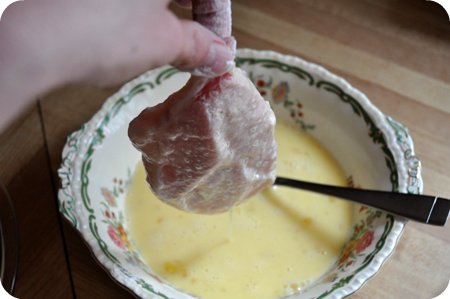
Then take ‘er for a dip in the egg:

egg bath

Shake off the extra (I see I have an Achilles heel happening there):

dipping

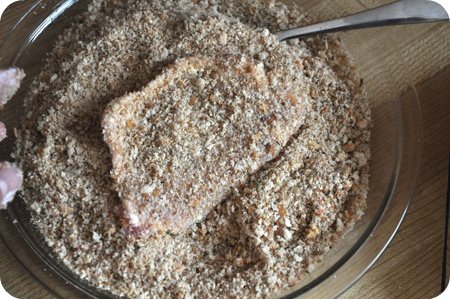
And coat in your prepared breadcrumbs. Don’t lose your meat in there:

still naked underneath those crumbs

Please note – you cannot reuse the breadcrumbs if you’ve been rolling raw meat in them. It’s best to separate what you need and add more if you need to. Are you still with me?

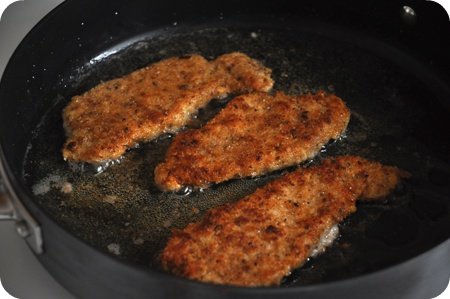
Fry your Tomkins’ Toastee Meat Snax™ in a bit of hot oil – a few minutes per side – until they are cooked through.

toasty meats!

Let them rest on a plate you’ve lined with paper towel (to absorb some of the oil) while you cook up the rest. We served these with corn, green salad, and sweet potato fries.

Eat it hot, or save it for the next day. You can even refrigerate them for reheating in toaster oven for convenient after school snacking! They are TOASTEEEEE MMmmmmmeat! ;)

All kidding aside, what do you think? Is this doable where you are? Or are you still tempted to buy frozen meat snacks that are toaster-ready?

Archives


  • Jeanie Maennling: I spent many wonderful days visiting my cousins and Uncle Herb and aunt Eleanor at the Farm in the 1950's. Mycousin Skippy (Sharon) and I got into l
  • alex: For a classic Canadian treat for valentine day , try a BeaverTail (a fried dough pastry) there its yummy
  • Juliet Luiz: I was at this park today and saw the foundation and historical sign which got me curious and let me to your blog post! Great information:) too bad t
  • Rowyn Tape: Hello, I was sitting at Easter dinner with my grandmother and she was telling me this story. She is Herbert Lytles daughter who eventually bought the
  • Bernie: I freeze ball sizes of bread dough for beavertails each winter season.Easy to thaw, roll out and fry. Best winter treat!
  • Jen_nifer: I feel very much the same about my SUP. Floating with snacks is fantastic! When I go on water with some current, I make sure that I paddle into the cu
  • sam: Great article. This is very insightful. Thanks for sharing

The Obligatory Blurb

My name is Andrea and I live in Ottawa with my husband Mark and our dog Sunny who is kind of a big deal on Instagram. During the day I work as a freelance writer. I am a longtime Ottawa blogger and I've occupied this little corner of the WWW since 1999. The Fishbowl is my whiteboard, water cooler, and journal, all rolled into one. I'm passionate about healthy living, arts and culture, travel, great gear, good food, and sharing the best of Ottawa. I also love vegetables, photography, gadgets, and great design.

If you're so inclined, you can read more about me here.

I've deactivated the commenting function as well as my contact form so if you want to get in touch, please drop me a line at quietfish@gmail.com. Thank you!


Goodreads